Sunday, September 30, 2012

Avonlea Layout Oct 13 and 25


I found this layout idea on the CTMH Bulletin Board and decided to present it as a class. The layout, although beautiful, does take a bit more time to put together. Most of the small details and objects are cut using CTMH's new cricut catridge Artiste! It's quite impressive up close and personal! This 2-page layout can also be framed for your wall if you think it is too precious to be placed in a scrapbook!


For anyone wishing to take the $15 prepaid class (sorry, have to charge for this one - you get all materials and objects are pre-cut - and paper left over for cards!) in the Spokane are, I will have it on 2 dates in October:
Saturday, Oct 13 at 6 pm and Thursday, October 25 at 10 AM and at 6PM. This class will be at 1128 W. Montgomery Ave in Spokane.

If you like it, please call/email to prepay and register - 530-588-4386 or juliana.pierre@yahoo.com!


For my customers in Western Washington and Northern California, I am trying to schedule this (or another class/workshop of your choice) during the first 10 days of December. Stay tuned for my schedule!


Wednesday, September 19, 2012

September Stamp of the Month Using New Alcohol based Markers


The above card is made using the September Stamp of the Month "Fall Favorites" and the alcohol based markers. Until September 31, you can purchase this stamp set for $5 with a $50 purchase.


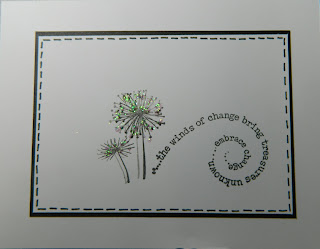
This is a photo sent to me by fellow CTMH consultant Laurie Flannery detailing the begining of a marker-colored flower. She used the "Card Word Puzzle" stamp set in the Spring/Summer 2012 catalog (still available for $13.95)!


 Here is some additional information on the new alcohol markers:

1. They come in all 40 of our color shades
o Each marker comes dual tipped – one end is a brush marker, the other end is a bullet/fine tip
o Markers come in a 2 pack and retail for $5.95. One marker is the true color of the set name and the 2nd marker is a shade darker or lighter than the true color to use for shading and blending.

2. Always store your markers horizontally and shake well before using
3. Alcohol inks are waterproof and can be layered and blended on surfaces other than paper
4. There is bleed-through when using alcohol ink markers.Be sure to use clean scratch paper to protect your surfaces and clean fingers when coloring. Also, plan on layering your colored images on your project if working on paper.
5. To prevent a ‘streaky’ looking image, evenly soak the paper.You have successfully and evenly colored your image if you turn over your paper and it is not blotchy looking
6. Blending Pen with Alcohol markers: The blending pen picks up and moves colors, it is more like an eraser than a ‘blending’ pen. You can use it to create highlights, ‘fade to white’ and fix minor mistakes.The blending pen also ‘pushes’color away from it.
7. It is highly recommended that you use our new Pigment Ink pads and heat set your image prior to coloring.

Here are a few usage tips:
Marker Blending on Paper – your basic ‘go to’ technique

1.Color evenly with your lightest color, smoothly soaking the paper and coloring in circles to avoid streaks.
2.While base color is still wet, add darker color to one side, lift up at the end of the stroke, leaving more ink in the area you want shaded
3.Go back over the darker color with your original shade to blend the two and create a smoother look
4.Repeat steps 2 and 3 until you achieve the shading look that you wanted

Feather Blending –this technique works best with long narrow images such as petals.

Please use the paper stamped with rectangles for this portion of the demonstration

1.Layer first color in one direction, press more firmly at the beginning of your stroke and lift as you go – fill in approx. ¾ of your image with this technique.The ink may only soak through where you have pressed the marker at the darkest part of the image.
2.Starting on the other side, use the same technique with the opposite color you have chosen.
3.Repeat layers until you have smoothly transitioned and blended your colors in the middle of the stamped image.
oTips for this technique:
§Use the side of the brush not the tip
§Lots of light layers work best for this technique
§OVERLAP your colors – don’t stop where the colors meet

Fixing Minor mistakes with a Blending Pen

1. The blending pen ‘pushes’ ink away from it – if your ink bleeds outside of the stamped image, you can color with the blending pen to ‘push’ the ink back inside the line.
oThis works BEST with lighter colors and for small imperfections.

Thank you CTMH consultant Karen Pedersen for the personal tips and techniqu


Sunday, September 16, 2012

Halloween is Just Around the Corner


The new Fall/Winter catalog has a couple very nice Halloween layout and card workshops available, as well as a Halloween 3-D party accessorizing project. Watch for my schedule of scrapbook layouts and card workshops just in time for Halloween.

You can also call me and schedule your very own workshop or class @530-588-4386. I have just finished working the Close To My Heart Booth at the Spokane County Fair and have quite a few bookings, so now is the time to schedule yours, or plan to attend one that is listed once I firm up the schedule!

A big thank you to all of you who visited our booth at the Fair - I enjoyed meeting all of you!


Friday, September 7, 2012

Spokane County Fair starts today!

All the CTMH consultants - including your truly, have worked very hard to make our display booth at the fair fun and creative. Stop by and do a Make and Take, or just say hello. Everyone who enters will win something, and there will be a grand prize giveaway!

Here are some pictures of the booth:


If you are not yet a "follower" on my blog just join, and you will receive a little something from me - be sure to give me your mailing address! I appreciate all of you!


Wednesday, September 5, 2012

Avonlea Display Board for the Fair

I didn't originally sign up to work at the Spokane County Fair, but now I'm going to work 5 shifts! I did the swap with the new Avonlea - one 2-page layout, three 5 1/2  4 3/4 cards, one 3 x 3 card and a 3-D item using the new Cricut Artiste. We will be demonstrating the new Cricut Artiste in our booth, so I'm busy and excited. Love the Artiste cartridge!!!

Voila! Fair starts on Friday......................


Wednesday, August 29, 2012

Spellbound Workshop On The Go


Here is just a few of the things that you can make with the Spellbound WOTG! The banner was fun and easy to do  - in fact it was all easy because I used the CTMH Artiste Cricut cartridge to do all the cutting! You get enough paper for the banner, 8 cupcake holders with with matching cupcake picks, 8 candy bags with decoration and a tie, and 8 drink wraps.


You will have paper left over to make additional items or cards or a couple scrapbook pages - whatever you like

Sunday, August 19, 2012

Celebrate the Old and the New

I've got to tell you that I am in love with all the new paper kits and accessories in the new Fall/Winter catalog! If you haven't received one, please call or email me and I'll see that you get one (I had to order more, and am awaiting the shipment)!

I made this box with the (retired) 10x10 sturdy box. Even though this box is retired, we have plenty of other boxes to choose from in the new catalog. You could easily use any kind of box you wish or have on hand. I had the 10x10 box left over so thought I would cover it with the new Belle La Vie paper. It has a magnetic closure that I emphazied with the large pearl button badge and a piece of pink plaid ribbon folded in half:


I used the (retired) bitty buds because they were pink and I had some left. I layered the piece with sparkle flouishes, black tulle ribbon gathered in the center, and the reverse side of La Belle Vie paper cut with the new Artiste cricut catridge. Then I covered the heart with three of the new Colonial White Rosette ribbon tucked in the center and topped it with another bitty bud. I had the pink feathers and pearl stick pins in my stash, and glued a bling button into one of our pin clips. It is so shabby chic - but really cool - I think I'll give it for a Christmas or birthday present. The box can hold a variety of things like jewelry, notes and envelopes - really anything special that will fit into a 10x10 box.


Here is a list of the supplies I used that are still available:
La Belle Vie paper packet - X7158B - $9.95
Clear Sparkle Flourishes - Z1708 - $4.95 (for 3 different swirls)
Black Tulle Ribbon - Z1798 - 10 yards of 3" wide tulle for $5.95
Pin Clips - Z1612 - 12 pins for $4.95
Bling ASsortment Buttons - Z1466 - 18 pieces with 3 stick pins for $4.95
Colonial White Rosette Ribbon - Z1800 - 5 yards of 3/4" wide for $7.95 - it is 3D, not flat
Pearl Button Badge from the Wrangler Assortment - Z1780 - $5.95

It's always a good thing to use up your old or retired "stuff" so you can replace it with new updated paper and accessories!

Friday, August 17, 2012

Back With a Vengence!

Well, it's been a long 2 1/2 months, and the hospital supply man came yesterday and took the hospital bed out of Kara's living room! I am walking and going upstairs and downstairs (albeit slowly), but I'm so happy I can get into the scrapbook room. Thank you all for waiting for me to get back to posting regularly!

Here is the CTMH Display Tray down with the new Avonlea Paper Pack and accessories. No pics yet, as it is a baby present for Keith and Lisa Dunlop (thus, the "D" at the bottom. The pics will be in black and white. This tray was inspired by Lisa Stenz of CTMH!

The size of the display tray is !2x12 and has 12 evenly spaced dividers, It is made of sturdy wood, and has 2 hangers on the back for easy display.


Supply List:
Avonlea Paper Pack - X7155B - $9.95
Avonlea Canvas Complements - X7155C = $5.95
Brocade Assortment - Z1748 - $5.95
Display Tray - z1750 - $19.95
Slate Satin Ribbon - Z1802 - $4.95
Colonial White Rosette Ribbon - Z1800 - $7.95
Parlor Velvet Rub-ons - Z1742 - $4.95
White crocheted flower from the Antiqued Gold Mini Medley - Z1786
Licorice Opaque Adhesive Pearls - Z1335 - $2.95
Pearl Button Badges from the Dakota Wrangler Assortment - Z1780 - $5.95
Slate ink pad - Z2173 - $5.25

Of course, if you buy each item individually, it is costly, however, you end up having a TON of paper and accessories left over, with to use in many other projects!


Tuesday, June 19, 2012

Leave of Absence

My hip surgery was on the 25th of May, and I got out of the hospital on the 6th of June. I have a lot of physical rehab to do, so I won't be posting anything until at least July - maybe later. I still cannot bear full weight on my hip, and cannot get downstairs to the craft room.....I feel like I'm in prison!!

I miss all of you, and can't wait to get back to work!

Tuesday, May 8, 2012

Still in Seattle

Well, I'm still in Seattle visiting and seeing the awesome sites - eating too much and having too much fun!


Saturday, May 5, 2012

Downtown Seattle

No crafting today. My sister-in-law for a few years, but a great friend for life, Connie and I spent the day having a late brunch, then heading downtown . We saw parts of the Pacific Science Center, then saw a 3-D-IMAX film called Polar Ice. It was fantastic. Had Mexican food for a late lunch, but neither of us walk well - or for a long period of time, so we just gazed at the Space Needle from the ground - just too tired to go up! But it was an awesome day in Seattle!


I think I was standing crooked! It really doesn't lean!! The top was recently painted Golden
Gare Orange for it's 50th anniversary!

Away for a few days....

I won't be blogging for a few days  as I'm in Seattle for a few days for fun and visiting - oh, and did I mention visiting scrapbook stores!!!!

Here's a couple of pics on my way to Seattle..................


These pictures are of the Columbia Gorge off I-90 in Vantage,
WA - midway from Spokane to Seattle. So much better in person!


Sunday, April 29, 2012

Card Ideas

My friend Jackie recieved her "Dotty For You" order last week and made me this card. It's so cute! We both love butterflies and glitter!


I made this card after being inspired from one of my followers Anika Lerche from Germany.  I used the May stamp of the month. I waterbrushed the flower first, let it dry and then went over it with matching colored markers. I cut a chocolate strip of cardstock and adhered it to the top, then put chocolate plaid ribbon (CTMH, but retired). I stamped the "Because" and part of the flower from the Card Word Puzzle stamp ( C1494 - $13.95).


Kara brought home a watermelon yesterday, and I got inspired! It doesn't take much of anything food  related to get me inspired. I had actually seen another card somewhat like this one on the CTMH bulletin board, too, but I used the Chocolate Alphabet small stamp - D1296 - $17.95 to spell "cool" and outlined in black between the smoothie and the sunset paper. Of course the paper is "Dotty" and the ribbon is not CTMH. I free-handed the watermelon and the seeds!


I love this card because it is so simple. Those of you who know me and my work, also know that sometimes it is hard for me to grasp the "less is more" theory!!! The bottom1/2" is black cardstock, then I used My Legacy Writers (pack of 5 different sized tips) - #4275 - $11.95, and drew lines using our clear 14" ruler with guide holes for punching and sewing (Z1471 - $9.95) - although I used it here for just making the lines straight)! The flowers are stamped with a small stamp from the solo "R" alphabet set, and the words are from Treasure Life - both are retired.


A few months ago Shannon made a layout using Dreamin and used small 1 1/2" x 1 1/4" squares. It looked really nice because it reminded me of a paned window. I used that idea here with the smoothie, lagoon and sweet leaf "Dotty" paper, and a smoothie paper flower from the Paradise Paper Flower assortment (Z1710 - $5.95). The "thinking of you" is from the stamp set For Every Occasion - D1187 - $17.95, The satin ribbon matches the lagoon, but it is not from CTMH.


Finally, I saw this tri-fold card on CTMH's Eye Candy site, but I don't know who originally did it. It is using the "Dotty" paper as well. The reason I liked it so much is that the lagoon and sweet leaf swirl paper was one that I really didn't care for until I saw this card! Funny how that works! The "Happy Birthday" also comes from the stamp "For Every Occasion" and I stamped in lagoon ink and used Lagoon tiny ribbon and matching brads from the lagoon Mini Medley from last year.


Friday, April 27, 2012

Got Ideas????

I've loved paper and paper crafting for a very long time - even before I started card-making and scrapbooking. Here are 4 ideas from the CTMH Spring/Summer catalog that you can do - or variations thereof.

Florentine Paper pack (X7153B - $9.95) Sparkle Flourishes (Z1708 - $4.95) Bitty Buds assortment (Z1690 - $4.95) Wooden Garden Shapes (Z1718 - $5.95) Bohemian Assortment (Z1687 - $4.95), and  Bitty Pearls (Z1707 - $2.95).The flower designs were cut using the Art Philosophy Cricut Cartridge (Z1686 - $99 - includes 3 matching stamp sets and 3 packs dimensional elements - cuts over 750 images!) Page 50 CTMH Spring/Summer catalog

This is a 12" x 14" shadow box frame decorated with the Footloose paper pack (X7151B - $9.95)Footloose Complements Dimensional Elements (X7151C), real ocean shells, lace, Seaside Wooden Shapes (Z1693 - $4.95) and the Keepsake Self Adhesive Felt Alphabet (Z1696 - $5.95). It looks terrific on this shabby chic wall with shabby chic accessories! Page 38 in the Spring/Summer CTMH catalog and Idea Book.

This is the Lucy paper pack (X7149 - $9.95) Lucy Complement Rub-ons (X7149C - $4.95) My Creations Mini Banner (Z1736 - $5.95), Bitty Buds (Z1690 - $4.95), sweet leaf stitched grosgrain ribbon (Z1383 - $7.95) and flower circles and letters cut from the Art Philosophy Cricut cartridge (Z1686- $99 comes with 3 stamp sets and 3 packs of dimensional elements). How darling for a little girls room or bathroom. Page 26 of the CTMH Spring/Summer catalog.
This is the Stella paper pack (X7147B - $9.95) Stella Complement Rub-ons (X7147C - $4.95), Bohemian Assortment (Z1687 - $4.95)Sparkle Flourishes (Z1708- $4.95), Cocoa Designer Ribbon (Z1316 - $7.95) Fashionista Acrylic Stamp (D1504 - $17.95) and cut out flowers  from the Art Philosophy Cartridge. You can really do all this with paper! Page 14 CTMH Spring/Summer catalog.

I want them all!

Tuesday, April 24, 2012

Decorative Glass Blocks

I love to decorate the 8" x 8" glass blocks that you can get at Lowe's or Home Depot ( I just saw one in Michaels the other day, too!). I've made a lot of Christmas gifts using the blocks, and this year for Easter I made 2 different kinds. When the Christmas season starts, you can find the blocks with pre-drilled holes in the bottom. You can also have a machinist drill the a small hole as well.


So, here's the story that surrounds this particular block:
My friends Keith and Lisa Dunlop are expecting their first child next month, and I was recently invited to a shower for her. Her colors and theme - whether it is a boy or a girl - are dark green, deep dark red and tan, baby animals of the forest, especially deer and moose. I always like to give a gift that is conscious and respectful of the wishes and likes of the recipient, but this was a challenge. I thought long and hard before I percolated the whole idea.

On side one, I took white mulberry paper and drew a scene of mountainous trees with CTMH markers. I cut several trees from card stock in varying colors of green, glued them on the mulberry paper, then stamped some deer and moose in the forefront. I put a sticker of just the head of an owl back in the trees, stamped an eagle flying overhead, and placed a gold star in the heavens. The mulberry paper was left to dry for a day, then I "glued" it down onto the block with Liquid Glass from Close To My Heart (Z679 - $6.95) and covered the whole paper with the liquid glass as well. Liquid glass is a clear, thick substance that you can use for many projects, and I find that it works well for adhering and protecting the mulberry paper on the block. When dry, it looks glossy.


For the other side of the block, I purchased some dark green mesh-like paper from Spokane Art Supply. I glued the paper down with the liquid glass, and repeated that process 3 more times. After it dried for a day, I decided I would just leave it instead of decorating it, because it came out dark in the from, but more light came from the back. (I had thought about making a tree out of buttons).

I fed a small string of white lights into the whole on the bottom, then wrapped the glass block in some wide tan tweed-like ribbon and knotted it at the top.

I always like to make homemade gifts, probably because I so enjoy receiving them as gifts. Anybody can purchase something at Target or Walmart or Nordstroms, but a handmade gift shows love, appreciation and caring beyond words. Nonetheless, it is always subject to rejection! Fortunately for me, Lisa absolutely loved the gift. Best of all, it couldn't be purchased or duplicated!

Find me on Pinterest and see other glass blocks I've made if you are interested.

Sunday, April 22, 2012

Dotty Layout For the Boys in Your Family

OK, yes, I'm still hooked on the "Dotty For You" paper. It has so many designs and there is so much you can do with it.

I know a beautiful young woman who has four boys. Her scrapbooks are gorgeous, by the way, but with four boys, she tends to stay away from the more feminine paper and such. I'm not going to mention any names, but you know who you are, Kari Watts! OOPS!

Anyway, I thought I'd make a couple more boyish layouts for her perusal!


Kari also makes her layouts to order - meaning she knows what pictures she is going to use, but these give you a pretty good idea of what else you can do with the Dotty paper. Remember, it's $5 for 24 sheets of double sided B & T paper, with an order of $35! Just click on "Shop With Me" if you'd like to order.

Shopping List
Layout #1 - I used the Cherish book for inspiration, choosing "Mixing Elements"
Dotty For You paper pack, specifically the sweet leaf and lagoon polka dot paper, the lagoon, sweet leaf and gray striped as well as the circle paper.
Gray flannel, sweet leaf, lagoon and colonial white card stock
Decor Journaling spots- Z1461 -  $5.95             
Baker's Twine - Paradise selection - Z1702 - $4.95
Bitty Buds (gray mesh flowers) - Z1690 - $4.95
The "Love" charm and the "Family" overlay on the top left gray polka dot paper are CTMH, but they are now retired.

Layout #2
I used "Imagine" Swing Rhythm" layout for inspiration
Gray flannel and sunkiss yellow card stock
Gray flannel and sunkiss polka dot paper, as well as the gray flannel, colonial white and sunkiss yellow B & T paper from the Dotty pack
The top left side journaling paper is from the Bliss My Stickease that is now retired but I try using things up
The banner pieces are from the Dimensional Elements Banners - Z1685 - $4.95 (they also come with the Art Philosophy Cricut cartridge with 2 other packs of dimentsional elements and 3 stamp sets) - Z1686 - $99
Pewter Ribbon Slides - Z1460 - $4.95
Pewter Mini Medley - Z1487 - $4.95
Round Pewter Durable Studs - Z1706 - $3.95
Baker's Twine - Neutral Assortment - Z1701 - $4.95
Pewter Badge Buttons - Z1704 - $4.95

By the way, ALL the How To Books, except Magic, will NOT be available for sale when the new Fall/Winter catalogs come out in September! If you want any of those, you should order them now!

Friday, April 20, 2012

Dotty Layout


This is a layout I did inspired by one I saw by Laurie Flannery, a CTMH consultant. I still had some beautiful floral pictures from my trip to Mexico last year, so I'm really glad I didn't use them all.

Just noticed looking at the paper flowers I adhered to the above page don't have brads or buttons in the center! It's an easy add-on.


Supply List:
Dotty For You paper pack - $5 with a $35 order now through May 31 - or while supplies last.
Sunset and while daisy card stock
Keepsake Smoothie Felt Alphabet - Z1695 - $5.95
Flutter Paper Shapes - Z1463 - $5.95
Sparkle Flourishes - Z1708 - $4.95
Prisma Glitter - Z134 - $4.25
Paradise Paper Flowers - Z1710 - $5.95
various brads and buttons
I used the Calligraphy Cricut Cartridge with layer and shadow on for the word "Barra"

Monday, April 16, 2012

Black and White

Ever since I made the black and white sunflower with the May Stamp of the Month - Friendship Bouquet, I've been in the mood to create just using black and white. Things just seem to turn out elegant and simple, yet formal.

The first card is made from a retired stamp set called Treasures, but I've always held on to it because I use it frequently and just love it. The stitching is done by hand (don't ask me why I did that  - I've got WAY too much time on my hands!!!)) using the CTMH Legacy Writers - .8 - #4275 - $11.95 for 5 pens of different sized tips. The little burst thing has prisma glitter sprinkled on it - #Z134 - $3.95.
                                     

This one was done by gluing one paper butterfly (Flutter Paper Shapes - #Z1463 - $5.95) down, then putting another butterfly of the same size over it. I only glued the top butterfly it in the center, so it kind of looks like it's in flight. I sponged the edges of the butterfly in black and stamped the word fly in white pigment ink and set it with the heat tool. I inked just the f-l-y from the end of word butterfly from the Butterfly Wings - D1341 - $17.95. Gotta love the acrylic stamps! The 3 blacks dots are Adhesive Opaque Gems from the licorice selection - Z1335 - $2.95.

I did this using the 3x3 music stamp from Universal Backgrounds - D1477 - $17.95. The staff, treble clef and notes are from A Melody - A1116 - $6.95. The ribbon is not CTMH.

Same as above except that the phrase "a note for you" is from the "Just For You" stamp set - B1398 - $9.95.

I saw something like this card at Shannon's the other day. She said it was inspired by one she saw on the internet, but can't remember what site or who did it. (If you know, please let me know, so I can give them credit). The words are from Universal Backgrounds - D1477 - $17.95, the chipboard flower is from the Dimensional Element Mixed Shapes (comes with the Art Philosophy Cricut cartridge) Z1688 - $4.95. The small butterfly is from Flutter Paper Shapes - Z1463 - $5.95, and I stuck the tiny Opaque Adhesive gems in the center of the butterfly (light gray from the licorice selection) Z1335 - $2.95. The flower sitting on top of the dimensional element is actually a sticker from BoBunny,

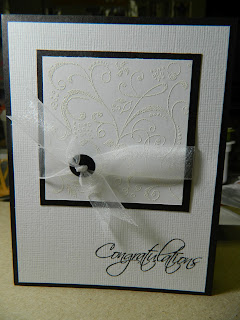
This card was made by Shannon Smoldt YEARS ago. It has been wrapped in cellophane and placed on the wall in Kara's scrapbook room. I think it's so old that the "Congratulations" stamp was rubber, not acrylic!! The white embossing is also from an old, retired stamp! But the card is still beautiful!

Another very simple card using stickers from BoBunny, but I stamped the "Thank You" from the Card Word Puzzle - C1494 - $13.95 and I put a Rhinestone Designer Brad (Z1360- $5.95) in the center of the vertical sticker.

Maybe tomorrow I'll make something colorful!